I've seen this recipe all over Facebook and Pinterest and had heard fantastic things about this pizza crust, but never got around to making it.
Well friends, this recipe fit perfectly into our book club "school theme" for WONDER and since we have a few gluten intolerant (me included) and vegetarian gals in the group I thought it would be perfect timing to test it out.
My husband who isn't gluten sensitive said "it was the best gluten free pizza he has ever had" (which is saying a lot) and when he saw me making another one to take to our party, he was sorely disappointed it wasn't for him.
Safe to say a head of cauliflower will be in our fridge on a regular basis from now on. Not only is it less expensive than gluten free flours or pizza dough, but it's low carb and it's a VEGETABLE. Yep, go ahead and eat that extra slice without the guilt peeps. It's okay!
Grain-Free Cauliflower Crust Pizza
(Makes one approx. 10-12 inch pizza)
(Makes one approx. 10-12 inch pizza)
INGREDIENTS:
1 small to medium sized head of cauliflower - should yield 2 to 3 cups once processed
1/4 teaspoon kosher salt
1/2 teaspoon dried basil (crush it even more between your fingers)
1/2 teaspoon dried oregano (crust it even more between you fingers)
1/2 teaspoon garlic powder
optional a few shakes of crushed red pepper
1/4 cup shredded parmesan cheese
1/4 cup mozzarella cheese
1 egg
optional 1 tablespoon almond meal (if you do not have enough cauliflower)
DIRECTIONS:
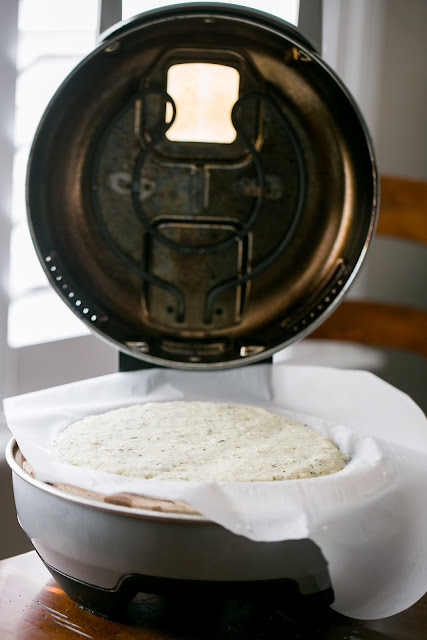
If you do not have a pizza oven (We have a Breville--a genius invention to have in the kitchen for perfect, quick pizza every time) preheat your oven to 450 degrees and place your pizza stone or baking sheet inside to preheat.


On a cutting board, place a large piece of parchment paper and spray it with nonstick cooking oil.
Wash and throughly dry a small head of cauliflower. (We had a huge head of cauliflower that was enough for two pizzas-so go for the big one if you want to make extra)
Wash and throughly dry a small head of cauliflower. (We had a huge head of cauliflower that was enough for two pizzas-so go for the big one if you want to make extra)
Pulse in your food processor until the cauliflower looks like snow. You should end up with 2 to 3 cups.

Place the cauliflower in a microwave safe bowl and microwave for 4 minutes. Allow cauliflower to cool before attempting the next step.
While the cauliflower is cooling, grate both of your cheeses.

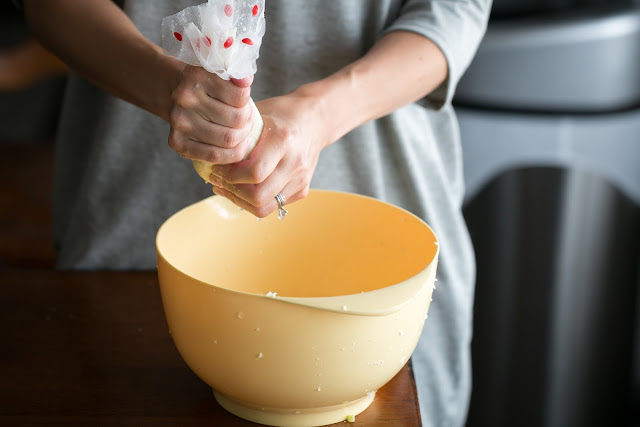
Once the cauliflower is cool enough to handle, wrap it up in a dish towel (I used one of my microwave splatter screens and it worked perfectly) and wring the heck out of it. You want to squeeze out as much water as possible. This will ensure you get a chewy pizza like crust instead of a crumbly mess.

Dump the cauliflower into a bowl and add the rest of your ingredients. Once all is mixed, add in your egg (add in an extra egg and double the rest of the ingredients if you have extra cauliflower and are making two crusts).

**Confession**....when taking these photos I forgot to mix in the egg and I used string cheese for my mozzarella because that was all we had...big mistake! It was still edible but use the real stuff or your cheese will be kind of rubbery and your crust crumbly. My husband still polished it off, but don't say that I didn't warn you. Your crust will be more puffy and bread-like and will hold together better with that egg.

Once mixed together, use your hands to form the dough into a crust on your oiled parchment paper. Pat it down thoroughly, you want it nice and tightly formed together and be sure not to make it too thick, otherwise you may want to divide your "dough" into two crusts.


Using a cutting board slide the parchment paper onto your hot pizza stone or baking sheet in the oven. Bake for 8 - 11 minutes, until it starts to turn golden brown. Remove from oven.
Add your sauce and your toppings and pop it in the oven for 8-11 minutes or until golden brown on top. I made The Lucky Penny's homemade sauce and it was SO worth it! Definitely recommend taking the few extra minutes. It makes enough sauce to freeze or store for later.
Make sure you let cool for a couple of minutes. I couldn't wait and completely burnt off the entire roof of my mouth. I've been paying for it for at least a week, so be careful!


No comments :
Post a Comment